
Coconut Raspberry Cake
Monthly Crumb, Ep. 7

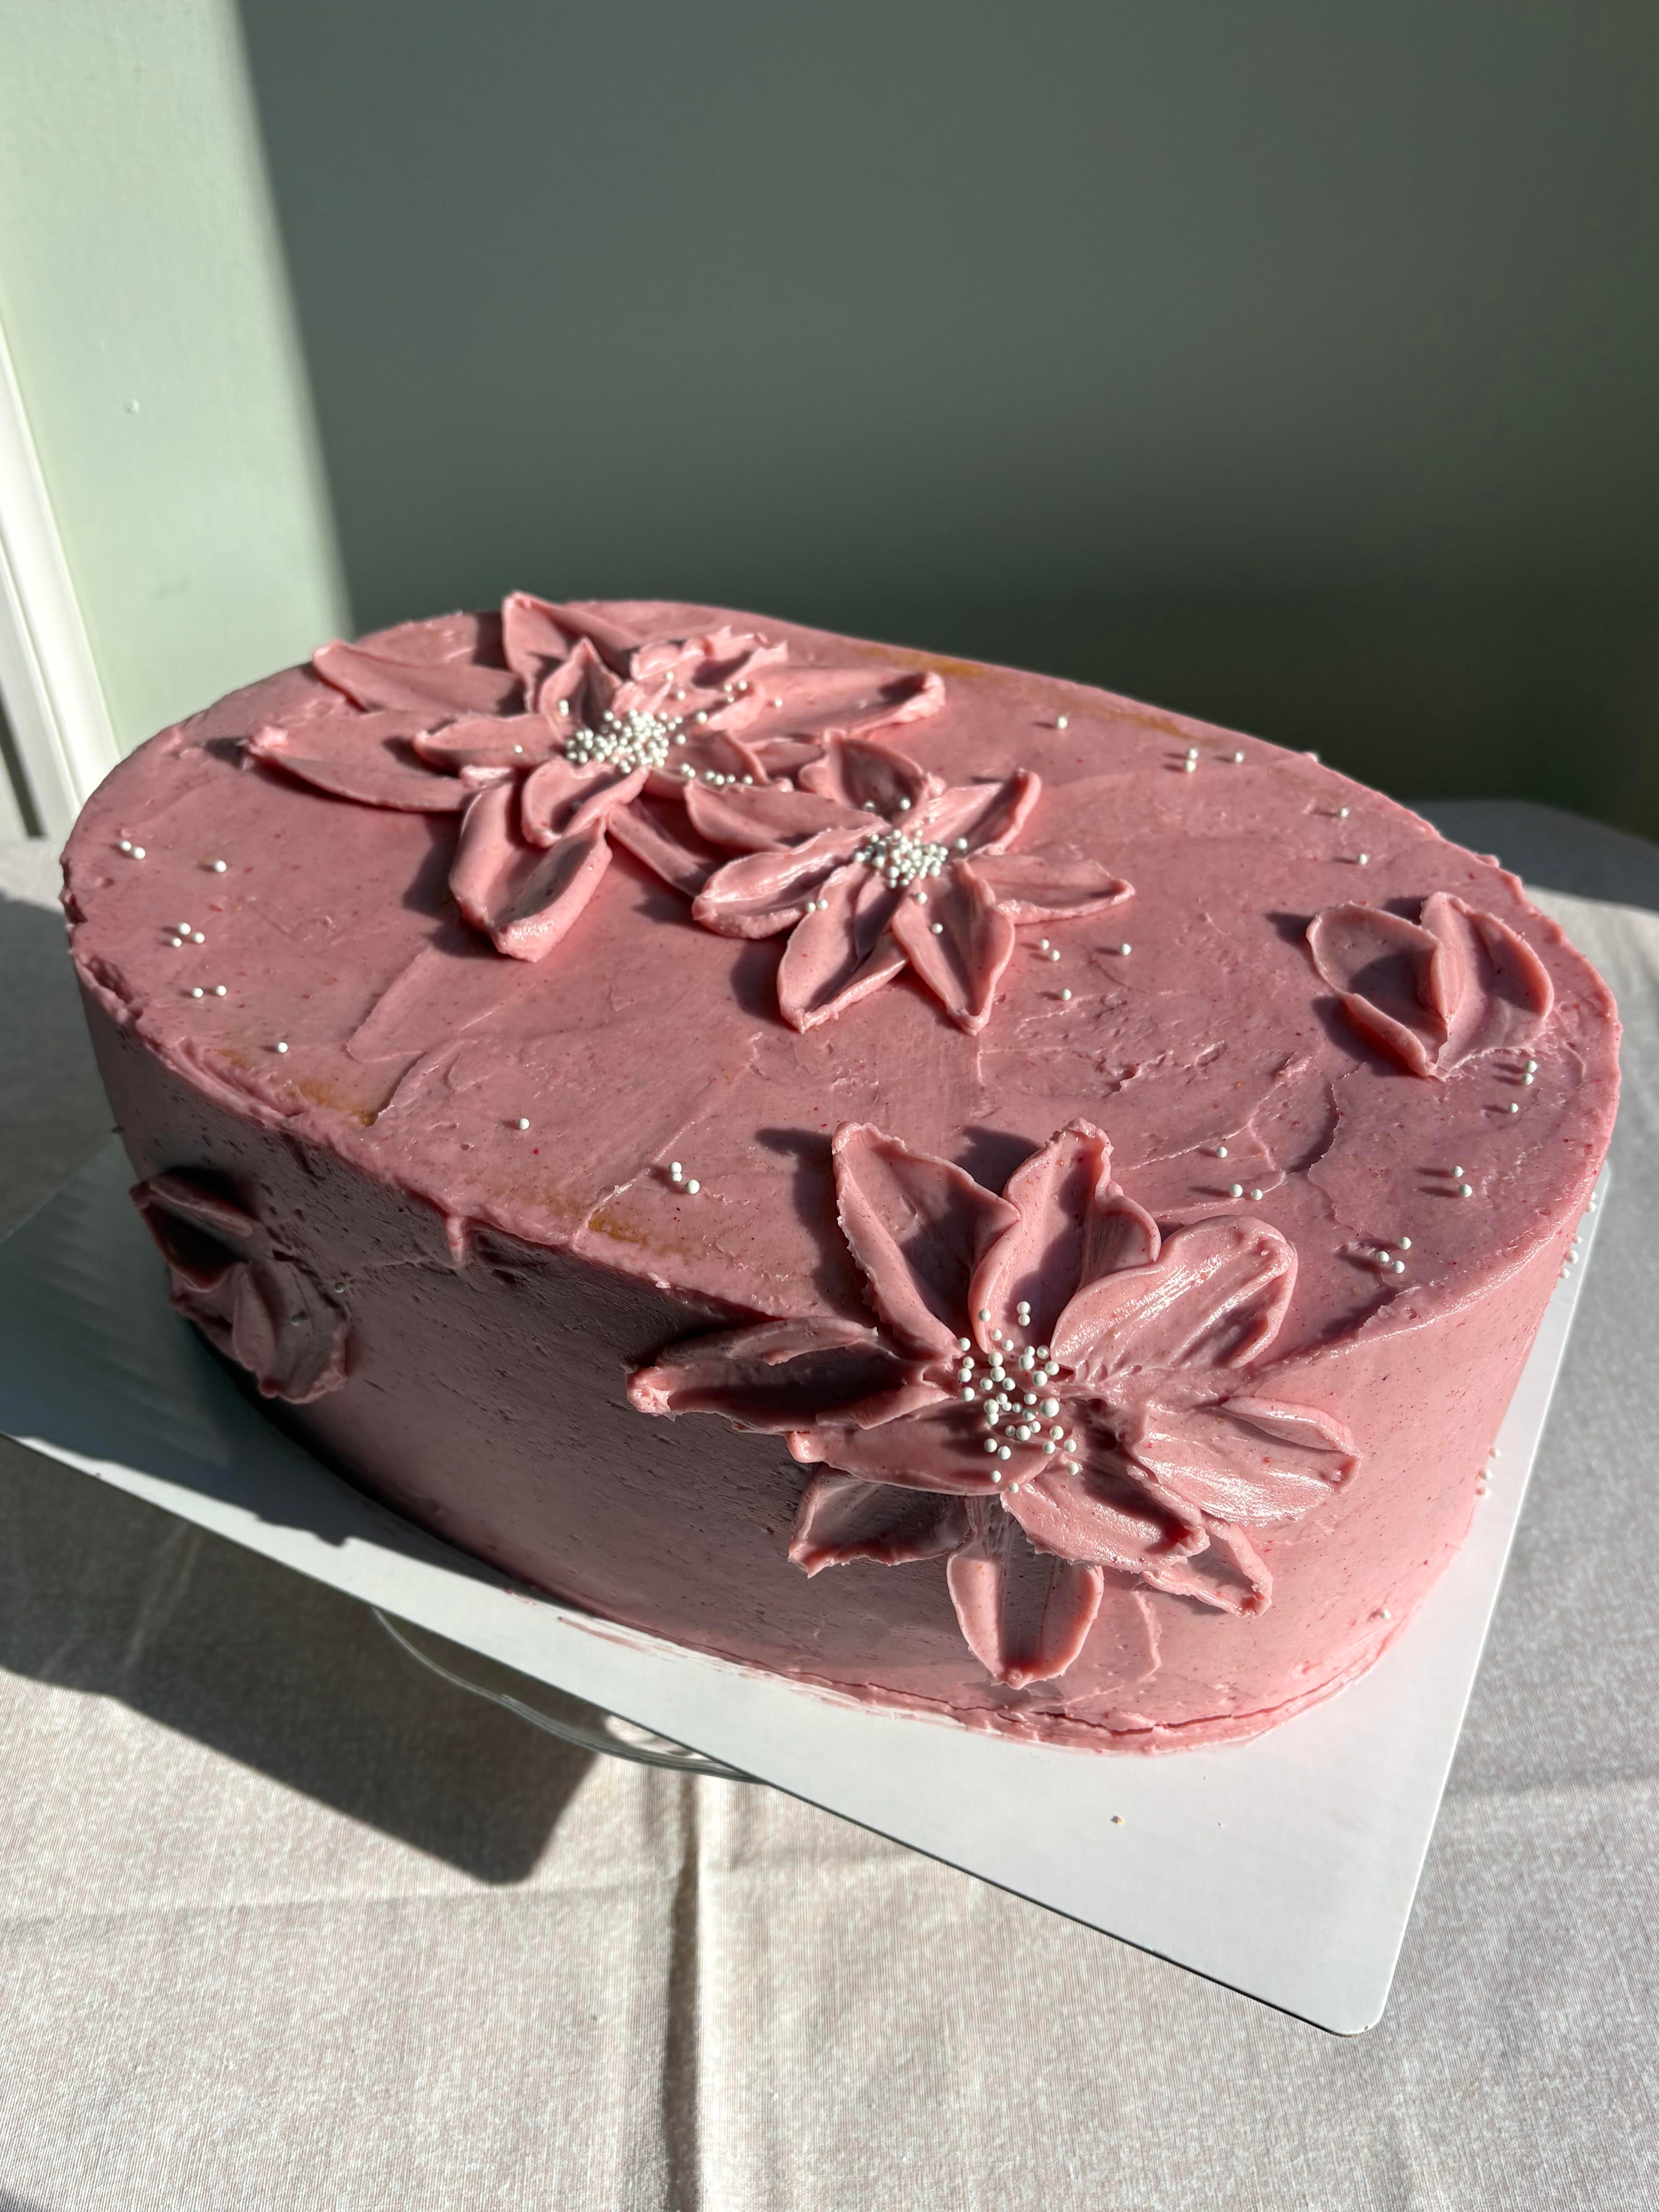
A pink cake? For February? Groundbreaking. But, so refreshingly delicious!
Honestly, I can’t believe that it’s been 7 months (!!) of doing these cakes. It’s been an especially tough winter and when thinking about what I wanted to do this month, I knew that something bright, fun and a little fruity was non-negotiable. While neither coconut or raspberry are super seasonal to February, the forms in which they’re used in this cake are freezer and shelf stable making them findable during any time of year!
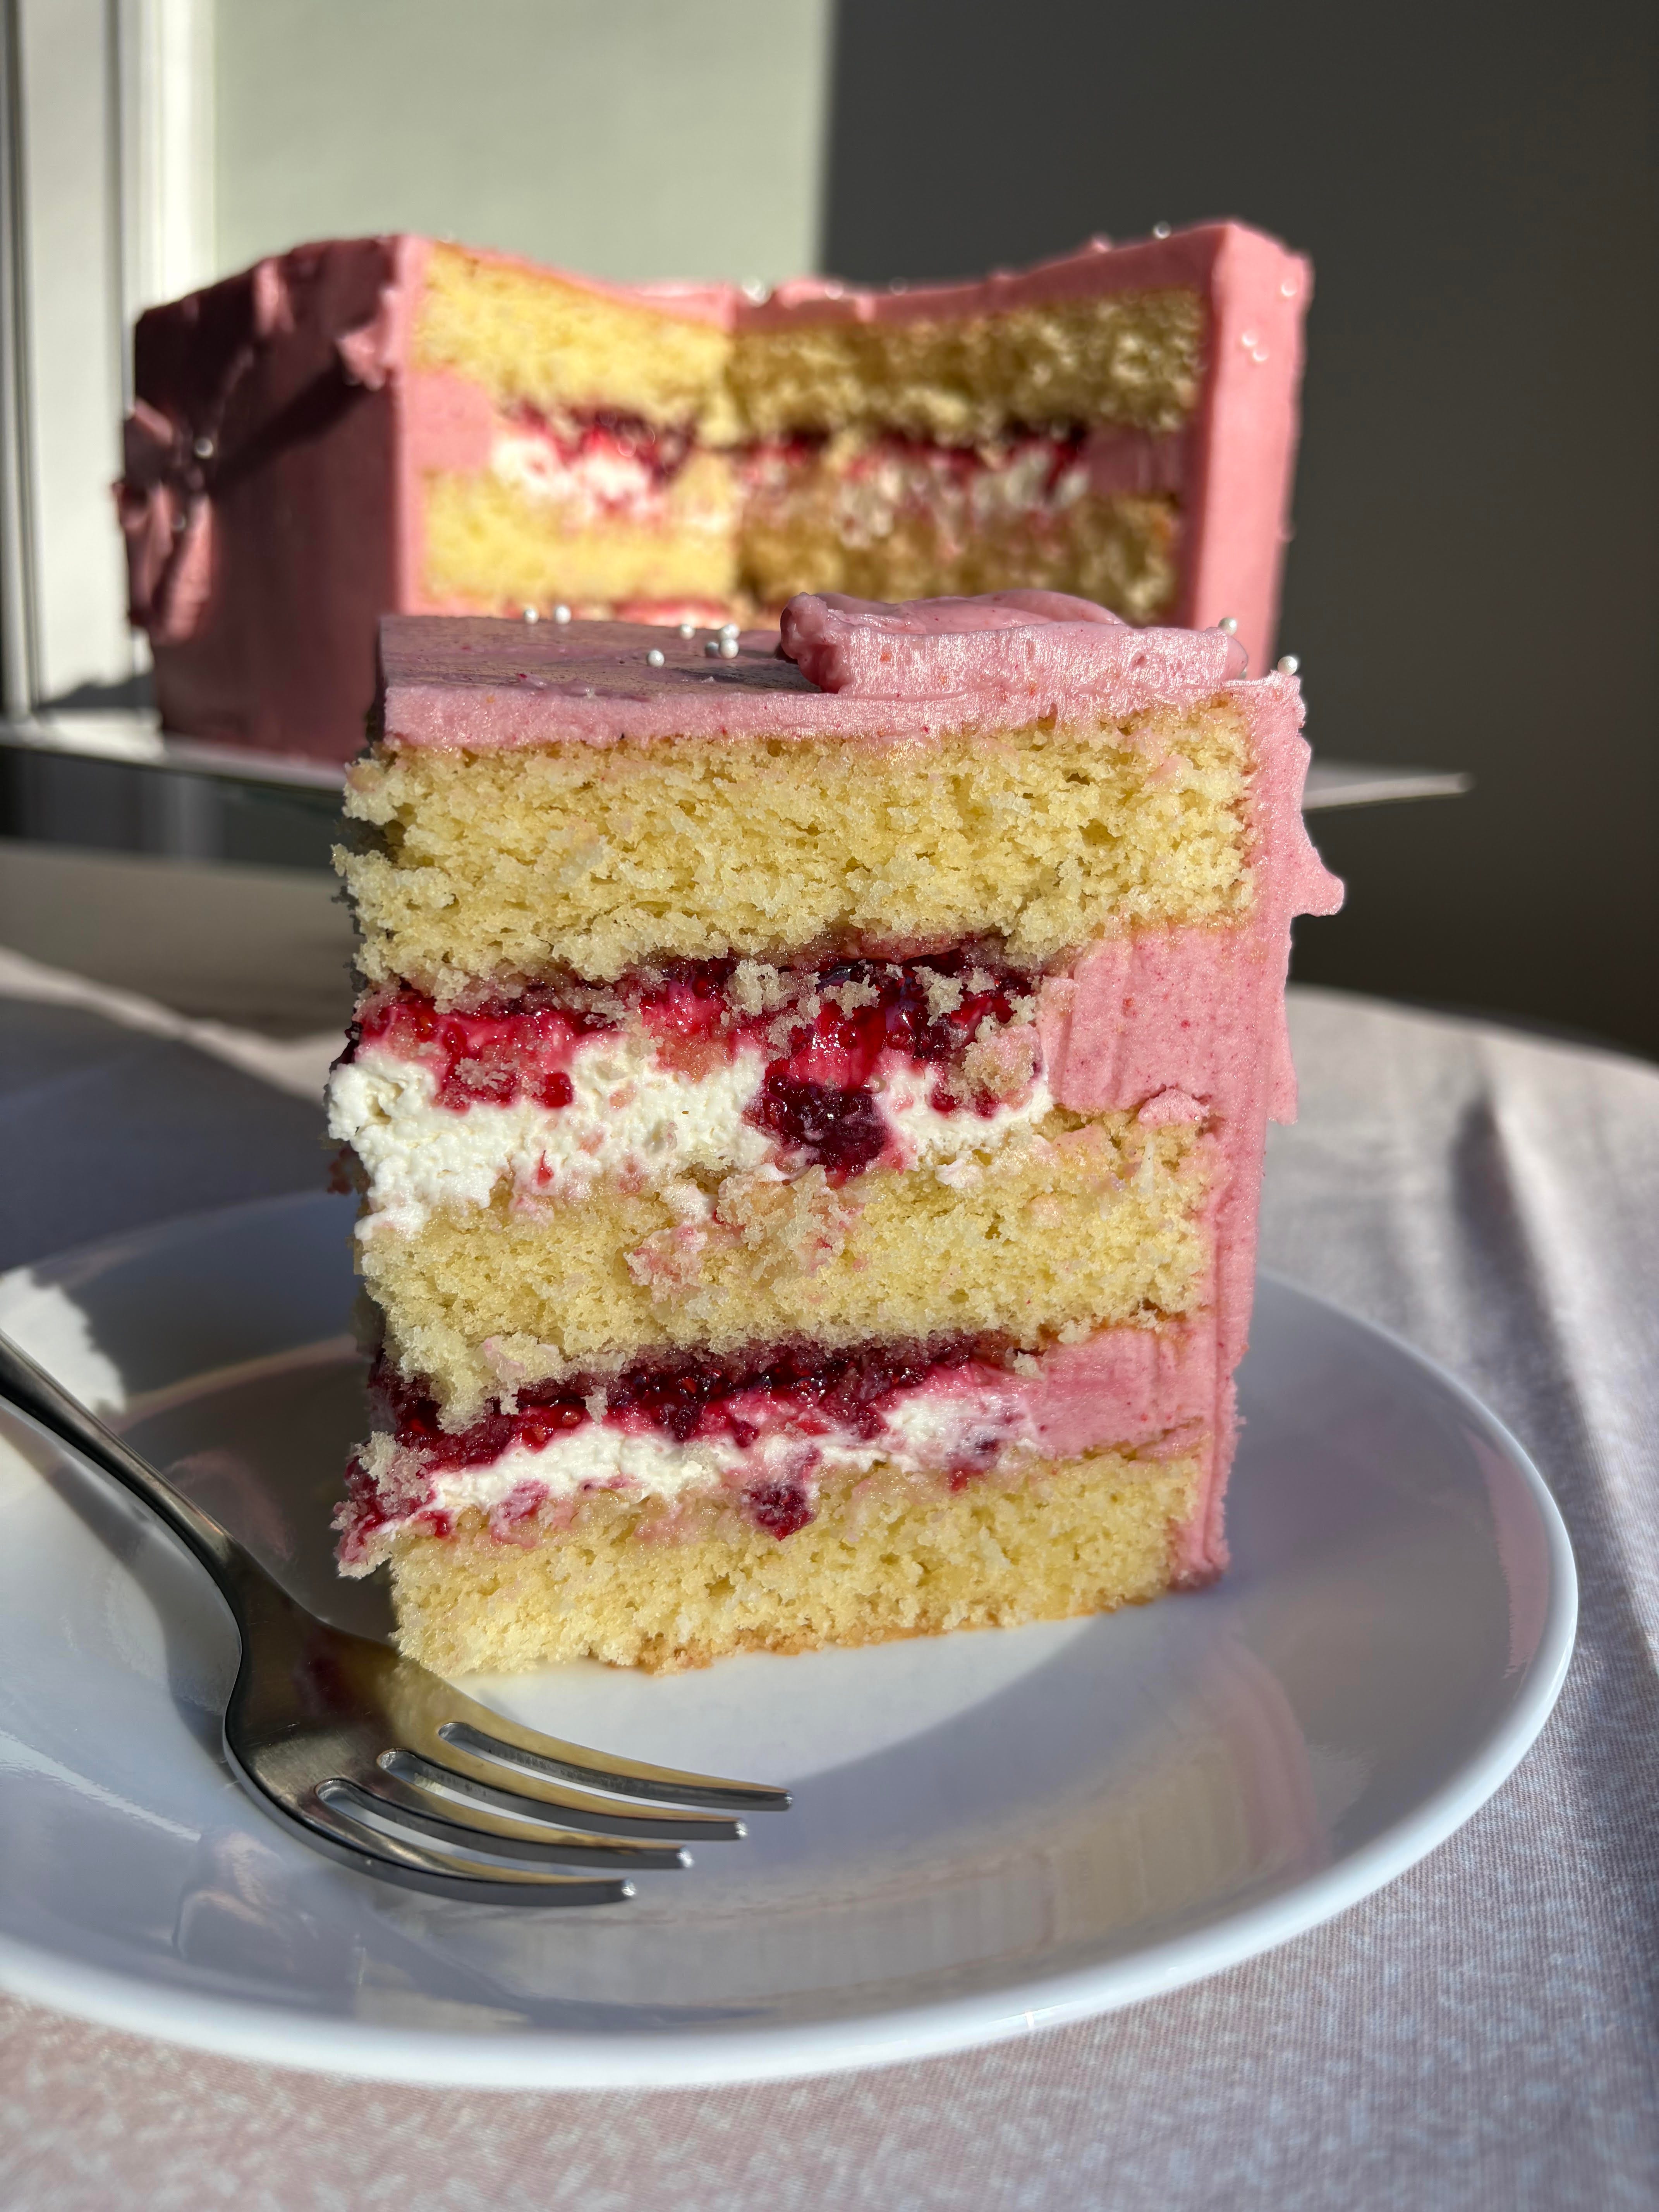
I find coconut and raspberry to be such a balanced flavor pairing. The raspberry, in both the jam and the Swiss meringue buttercream are zippy and bright, while the coconut cake and whip offer a cooling, mellow complement. I made sure to fit a good amount of fillings between the cake layers to maintain the ideal 1-1 cake to fillings ratio, and it achieved the perfect balance!
Visually, I was after a cake that looked celebratory and romantic since I was making this the weekend just before Valentine’s Day. I had a vision in my mind to do some ornately piped flowers, which perhaps I will on a future cake, but for this one, abstractly smeared palate knife flowers actually fit the bill perfectly to create a cake design that was low effort but high impact. They’re unfussy, completely customizable and the kind of cake decorating technique that is pretty beginner friendly. If you’re asking me, I would definitely opt for receiving a cake covered in flowers over actual flowers any day. Both are sweet! But only one can satisfy my sweet tooth.
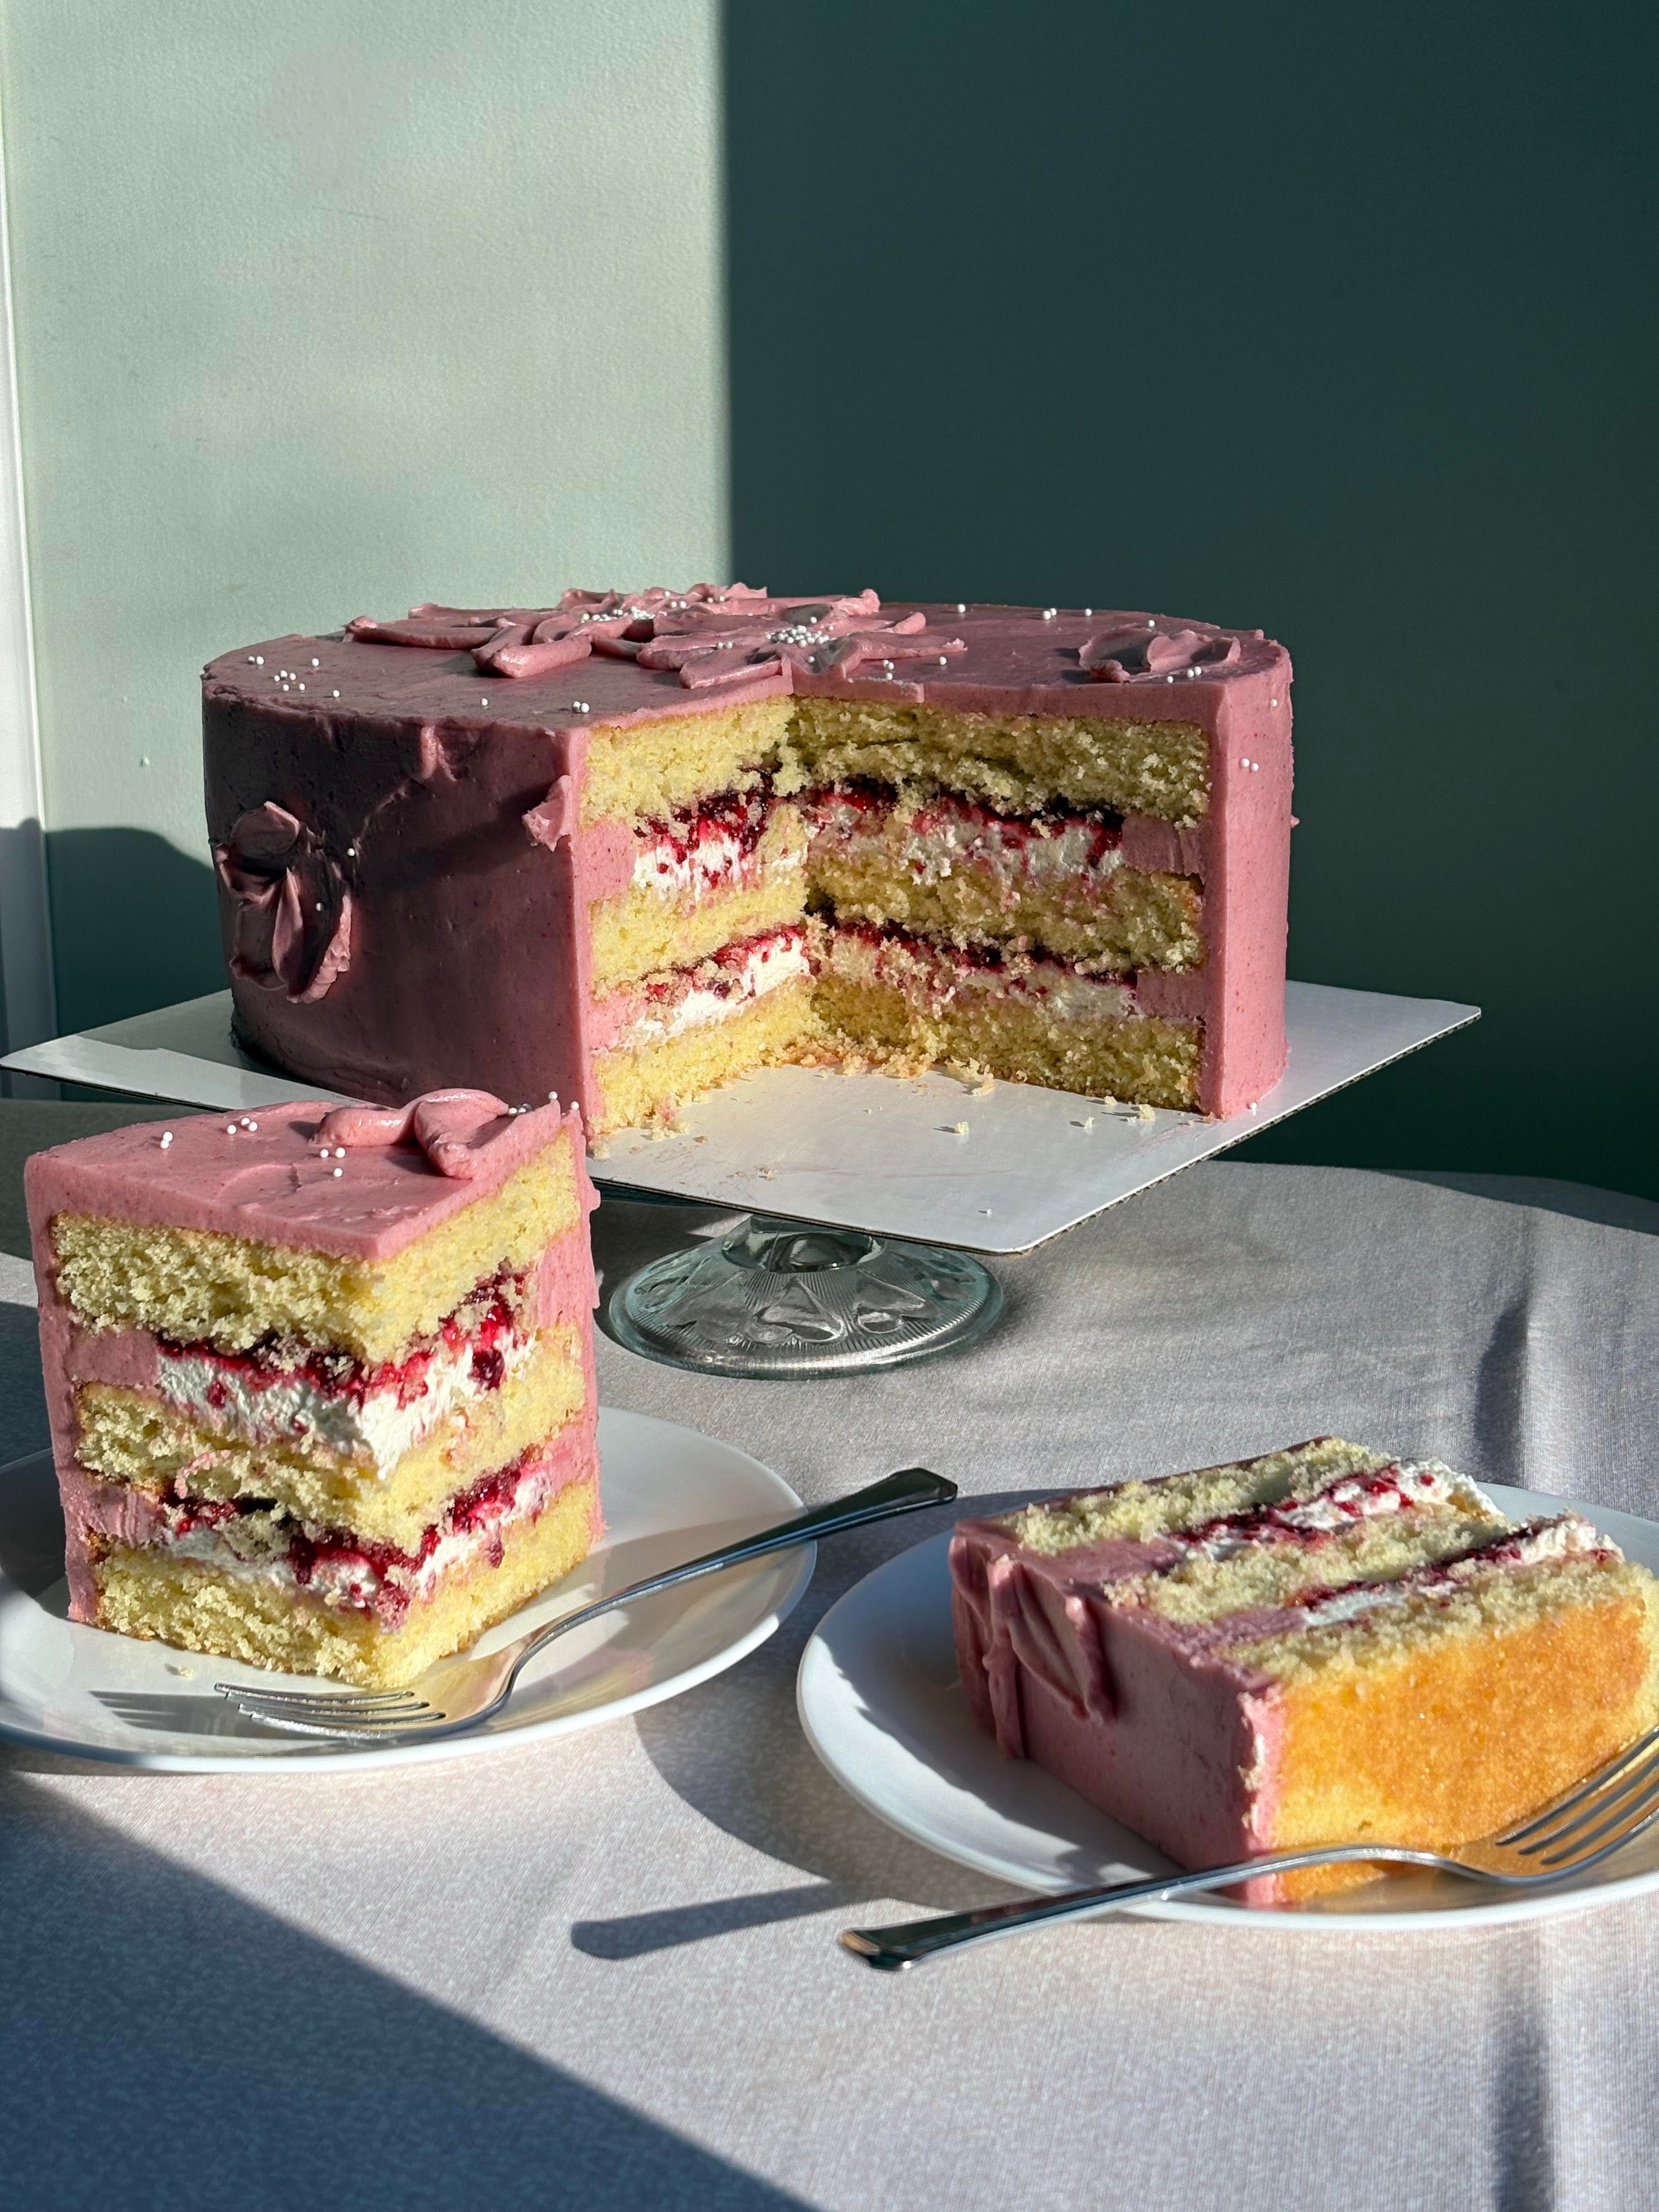
Recipe Note: Here we had yet another BIG cake! More realistically, you may be interested in making an 8 inch round layer cake. I’ve made a note under the cake ingredients about cake quantities, but the other elements would still work volume-wise whether you made a round or rectangular/carved cake like I did. You may have some leftover fillings/frostings if you go with the 8 inch cake, but not too much since you’d have 4 instead of 3 layers!
Disclaimer: For the coconut cake layers, I slightly modified the recipe/method from Cupcake Jemma’s coconut cake layers that she made in her Piña Colada cake. Watching her videos on YouTube over the years have taught me so much about baking techniques and I am such a fan. Please check her out if you haven’t already!
Ingredients
Coconut Cake Layers:
1 cup (330 g) unsalted butter, room temp
2/3 cup (135 g) vegetable oil
2 1/2 cups (500 g) white sugar
8 eggs, room temp
1 1/4 cups (100 g) desiccated coconut (not shredded!!!)
3 1/3 cups (400 g) all purpose flour
1 1/2 tsp baking powder
6 tbsp coconut cream (should be in a liquid state)
1 tsp coconut extract
1 tsp salt
Note: These quantities make 4, 8 inch round cake layers or 2, 9x13 rectangular layers. If you want to make 3 rectangular layers like I did, make 1.5x this recipe.
Raspberry Jam:
12 oz. (340 g) frozen raspberries
1.25 cups (250 g) white sugar
3 tbsp lemon juice (about 1 lemon)
Coconut Marscapone Whip:
8 oz. marscapone, room temp
3 tbsp coconut cream
3/4 cup powdered sugar
1 cup heavy cream
1/2 tsp coconut extract
Raspberry Swiss Merginue Buttercream
9 egg whites
2 1/4 cups (450g) white sugar
3 cups (680 g) unsalted butter, room temperature
1 1/2 tbsp vanilla extract
1/2 tsp salt
2 packages (68 g) freeze dried raspberries
Method
For the coconut cake: Preheat the oven to 340F and prepare 4, 8-in round OR 2, 9x13 rectangular cake pans with nonstick spray and parchment paper. Depends on what shape you’re going for!
To the bowl of a stand mixer fitted with a paddle attachment, add the butter, oil and sugar. Mix on medium speed for about 5-6 minutes until VERY light and fluffy. The mixture should at least double in volume.
Next, one at a time, add the eggs and mix on low before adding the next. Scrape down the sides of the bowl in between each addition.
In a medium bowl, combine the flour, desiccated coconut, baking powder and salt. Whisk to combine. In a measuring cup, add the coconut cream and coconut extract. Set both aside.
Working in alternating batches, add about 1/3 of the dry ingredients to the stand mixer bowl and GENTLY mix on low to combine with the butter-oil-sugar mixture. While mixing, pour in 1/2 of the coconut cream mixture. Repeat this process again, adding another 1/3 of the dry ingredients, the remaining coconut cream mix, then finish with the last 1/3 of the dry ingredients. Mix until just combined; don’t overmix!
Pour the batter evenly into your prepared pans and bake for 26-28 minutes, until lightly golden on top and a toothpick comes out clear when inserted into the center. Allow to cool to room temperature. Wrap with plastic wrap and store at room temperature until ready to use.
For the raspberry jam: Add all ingredients to a medium, heavy-bottomed saucepan and gently mix to combine. Place over medium heat, and cook until the raspberries begin to break down and bubble. Gently smash them with the back of a fork to release their juices.
Once the mixture appears liquidy, adjust the heat to medium-low and let simmer for about 45 minutes, until slightly thickened.
Transfer to a heat-safe container and allow to cool at room temperature. Store in the fridge until ready to use.
For the coconut marscapone whip: To the bowl of a stand mixer fitted with a whisk attachment, add the heavy cream, powdered sugar, and coconut extract. Beat on medium speed until medium-stiff peaks form, about 2-4 minutes.
Add the marscapone and coconut cream, and continue whisking until fully incorporated and fluffy, about 20-30 seconds. Store in the fridge until ready to use.
For the raspberry Swiss meringue buttercream: In a small blender or spice grinder (I used a NutriBullet), blend the freeze dried raspberries until a powder forms, about 1 minute. Sift the powder through a sieve to remove any chunky seeds, and set the fine powder to the side.
Combine the egg whites and sugar in a heat-safe bowl and place over a double boiler on the stovetop set to a medium-low heat. Whisk continuously until all of the sugar has dissolved and the temperature of the mixture is 160F. Remove from heat.
Pour the sugar-egg white mixture into the bowl of a stand mixer, and mix on high with the whisk attachment until the mixture is a white, pillowy and voluminous meringue with stiff peaks, about 6-10 minutes.
At this stage, add in the room temperature butter in 2-tablespoon increments, waiting about 10 seconds between additions, until all of the butter has been added. Continue whipping until the buttercream comes together (note: SMBC will often look a bit curdled JUST before it comes together into a silky smooth buttercream. If you see this, you’re almost there!) Once the buttercream comes together, switch to the paddle attachment and add the vanilla and salt, and raspberry powder, and mix to combine. Set the mixer to mix on low for 10 minutes to smooth out the frosting and remove the air bubbles. Set aside until ready to use. Note: If your kitchen is cold during winter like mine was, your frosting may seem firmer than normal. If that’s the case, you can pop small batches of the SMBC in the microwave for a 10-15 seconds + give it a stir to loosen it up and make it smooth/pipeable!


Assembly
Below I describe the steps I followed to create the exact cake you see on my Instagram, but feel free to make and assemble these elements however you’d like!
Carve the layers: To make an oval template, take a 9x13 in sheet of parchment paper and fold it into quarters (first in half along the length of the sheet, then in half along the width). Use a pencil to carefully trace an arch between the two diagonally opposite corners and cut along this line (this is a bit tricky to describe, so take a look at my video to see the shape!)
Lay each cake layer flat and place the parchment stencil on top so each rounded corner aligns with the straight edges of the cake (see video). Cut along the stencil to remove the corners of the cake. Repeat this process for each cake layer.
Build the cake: On a large cake board, place your first cake layer, then pipe a border of raspberry Swiss meringue buttercream along the perimeter. To the center of the layer, add 1/2 of the coconut marscapone whip and use an offset spatula or spoon to spread it out evenly. Next, add 1/2 of the raspberry jam and use an offset spatula to spread it evenly atop the coconut marscapone whip.
Add the next cake layer, and repeat Step 3.
Add the final cake layer to the top of the cake. I like to use one of the layers that baked along the bottom side of the pan. Invert it so the smooth/flat side is facing up (towards the ceiling) and place on top of the cake.
Apply a crumb coat: Cover the cake in a very thin layer of SMBC to lock in the crumbs, and pop in the fridge to chill for at least 20 minutes.
Frost the cake: Next, cover the cake in a thicker layer of buttercream and use an offset spatula and metal cake scraper to smooth out the top and the sides. Once smooth, place in the fridge to firm up for 10-15 minutes.
Decorate: Add a dollop of frosting to a flat cutting board or plastic plate. The most important thing is that it’s a flat and smooth surface! Using a metal palate knife, pick up about a teaspoon of frosting, and scrape the knife back and forth at a 45 degree angle to smooth/shape the frosting on the back of the knife (see video). Apply the frosting on the cake in a gentle, swooping motion to form one petal, and repeat the process to form more petals, and ultimately, flowers! Add as many as you’d like around the cake.
Finish the cake with non-pareil sprinkles, both in the center of the flowers for dimension, but also scattered lightly atop the whole cake!


As mentioned, I’m by NO means an expert in palate knife flowers but think a lot of the beauty is in the abstract imperfection. Using the same color frosting for the cake and the flowers adds a really nice 3D element to the design. It’s also a great way to decorate a cake with a limited amount of frosting (all the flowers I made used about 1/2 cup of SMBC)! While I had originally intended for something more ornate for this cake, by the time all was said and done, the frosting supplies (and my energy lol) had dwindled and this was a really great plan B!
As always, thanks for reading and following along on these cake posts and videos. I can feel winter winding down and am so excited for some spring baking and cake making in our futures!!
Happy baking,
Julia
Looks delish!